Blog
How to Use Appium Inspector for Mobile App Testing Tutorial
Imagine being able to explore your app's ins and outs – interacting with buttons, fields, and more – all while making testing a breeze. Whether you're a seasoned tester or just starting out, this Appium Inspector testing guide is for you.
Tired of wrangling with test scripts for your native and mobile apps? Consider a more straightforward approach. Enter Appium Inspector, a game-changing graphical interface tool. It's a magic wand for testers, developers, and quality assurance analysts. Imagine being able to explore your app's ins and outs – interacting with buttons, fields, and more – all while making testing a breeze.
Whether you're a seasoned tester or just starting out, this Appium Inspector testing guide is for you.
What is Appium Inspector? How Does it Work?
Appium Inspector is a Graphical User Interface (GUI) tool that allows you to automate the process of inspecting, testing, and debugging mobile apps with Appium. It is powered by the Appium server, which is a tool for automated mobile app testing. Appium Inspector is especially useful when finding GUI element locators for writing Appium test scripts. It is also a good tool for debugging Appium test scripts.
Appium Inspector works by connecting to an Appium server, acting as a visual interface to allow you – the tester – to interact with the app running on a real device or emulator through point-and-click actions. Using Appium Inspector, you can explore the app UI, find elements and their properties, and generate test scripts in your language of choice. The best part is that you don't need any programming knowledge to get started. You just point, click, and swipe.
In case you are wondering how this happens, here is how Appium Inspector works:
Start the Appium server.
Open Appium Inspector and connect it to the Appium server.
Select the mobile device or emulator that you want to inspect.
Appium Inspector displays the screen of the mobile device or emulator.
You can use Appium Inspector to click on elements, view the locators of elements, and take screenshots.
Key Features and Benefits of Appium Inspector
Appium Inspector is a free, open-source tool that allows you to inspect native and hybrid mobile apps. It gives you an easy way to explore and test your app without having to build automation scripts.
Some of the main features and benefits of Appium Inspector are:
Visual interface for test creation – The drag-and-drop interface makes it simple to create and edit tests without needing to know a single line of code. You can visually select elements, enter test data, and build entire test flows.
Open source – Appium Inspector is open source and free to use. The code is transparent and customizable if needed.
Large community support – As part of the Appium ecosystem, Appium Inspector benefits from the support of a large open-source community. You can find help and best practices from other testers and developers.
Test on real devices or emulators – Appium Inspector supports testing on both physical mobile devices and device emulators and simulators like those in Android Studio and Xcode. You have flexibility in how you want to run your automated tests.
Debugging tools – The Appium Inspector interface provides tools to help troubleshoot and debug your automated tests. You can pause tests, step through nodes one by one, and inspect values to resolve issues.
Supports advanced features – Although the interface is simple to use, Appium Inspector provides access to powerful features like page object support, data-driven testing, and custom scripting in various languages when you need more complex test scenarios.
Getting Started with the Appium Inspector Interface: A Walkthrough
Before starting to run tests on Appium Inspector, we first need to get familiar with its interface. As we have already established, Appium Inspector allows you to record, screenshot, and playback tests without needing to write a single line of code – so the UI navigation comes in handy here.
The Appium Inspector interface is made up of a few main parts:
The Record and Playback Control Panel: This is where you start and stop recording tests, play tests back, etc.
The Selector Editor: This is where you can view and edit the selectors used in your test. Selectors help the test find elements on the screen.
The Test Editor: This displays the actual test code being recorded in the Selenese (Selenium) format.
The Device View: This shows what is displayed on the device screen and allows you to interact with the device to build your test.
How to Test a Windows Application in C# Using Appium Desktop Inspector
Prerequisites
Before you dive into testing, ensure that you have the following:
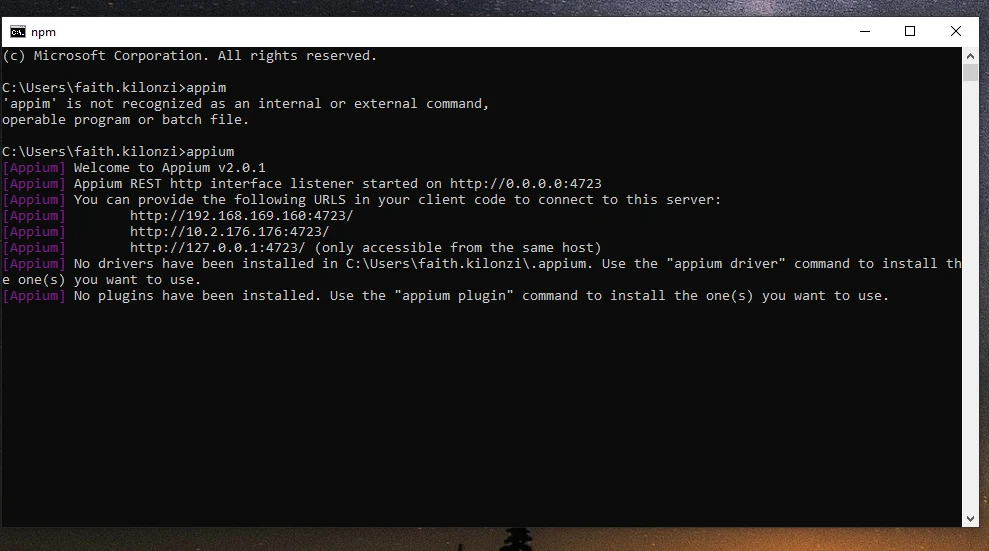
Appium Desktop Inspector: Download the latest stable version for Windows from the Appium Desktop Inspector GitHub page and install it. Alternatively, in the command prompt window, type the following command and hit the enter key:
npm install -g appium
Windows application: The target application you want to test on the Windows platform.
In our case, we will utilize a basic calculator application written in the dotnet Windows Forms template in this repository.
C# development environment: Visual Studio to run the application.
Basic knowledge: Familiarity with C# and Appium will help you understand the process.
Install Appium Desktop Inspector
Download the installer: Head to the Appium Desktop Inspector GitHub page and download the latest stable version for Windows.
Run the installer: Once the download finishes, run the installer. If a security warning appears, click Run anyway.
Complete the installation: Follow the installer's prompts to complete the installation.
Finish the installation: When the installation is done, click Finish. This automatically launches Appium Inspector.
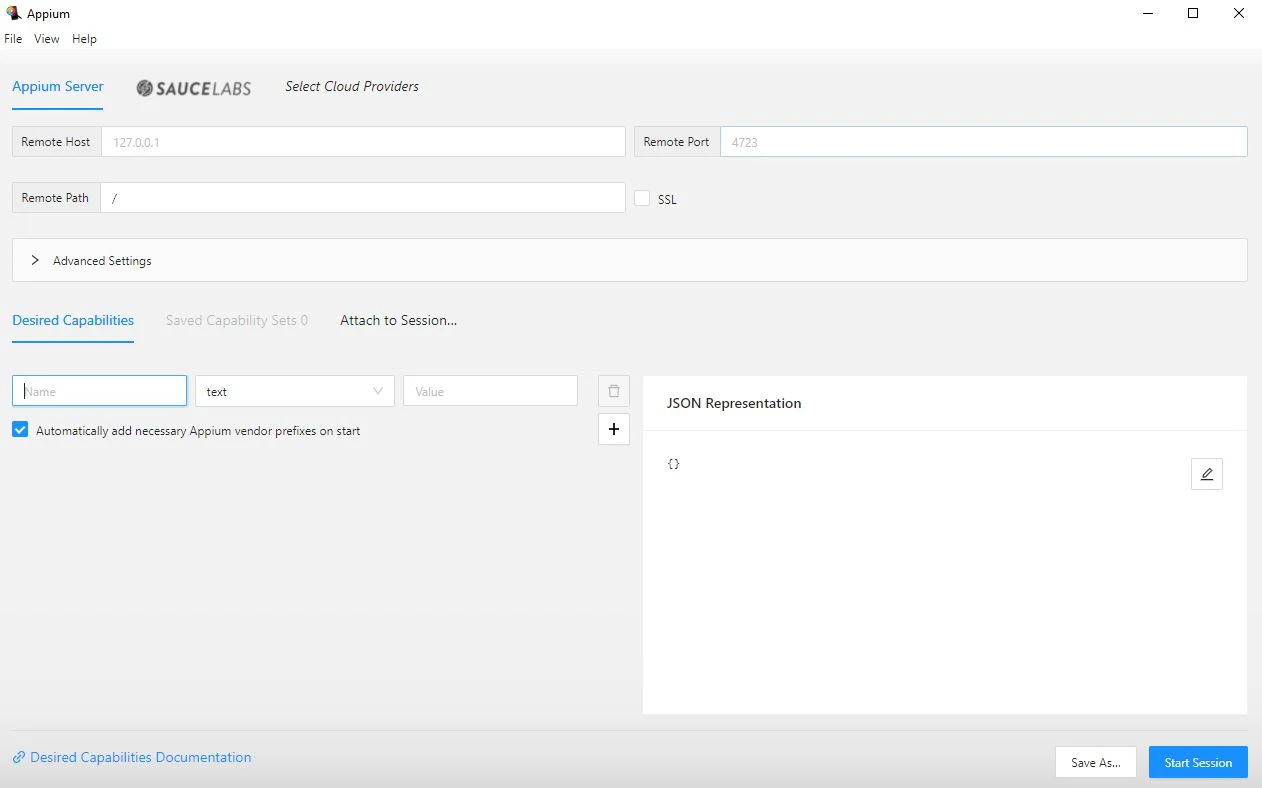
Test a Windows application
Since we already have our Appium Desktop Inspector open and launched, the next step requires us to connect it to our calculator application (which is open in our Visual Studio).
We will then inspect and select the various elements we intend to test (in this case, that means addition, subtraction, and multiplication calculator operations). To achieve this, we have to examine and take note of the ID, name, and XPath of the buttons because these properties are crucial for the Appium Inspector to perform the testing.
This should have our Appium Inspector interface looking like this:

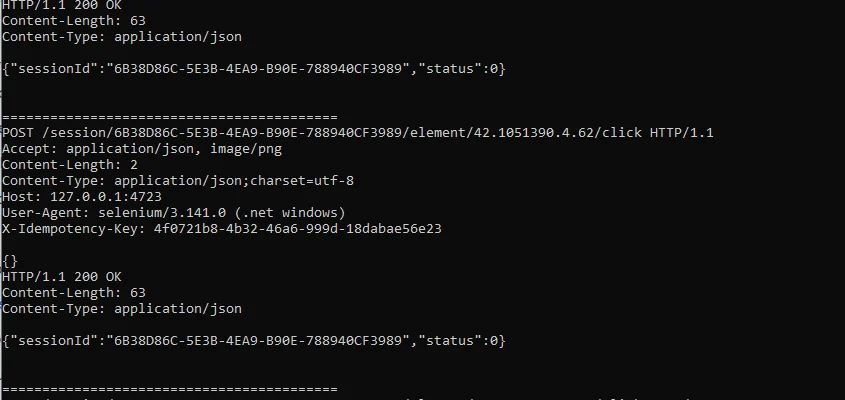
After this, we are ready to record our first test by interacting with the calculator interface. We will be tapping the elements, entering texts, scrolling, etc.
Every action is recorded by the Appium Inspector desktop client. When launched, the Windows application driver looks like this:
Writing a sample test
Inside our Program.cs file, we will write a short piece of C# code to test the addition functionality such that when a user clicks 1 + 2, the result should be 3.
This happens after initializing the Appium WebDriver, which Appium Inspector will use. The entire test script will look like this:
using System;
using System.Collections.Generic;
using System.Linq;
using System.Threading.Tasks;
using System.Windows.Forms;

using OpenQA.Selenium.Appium;
using OpenQA.Selenium.Appium.Windows;

namespace Win_CalcUI
{
    static class Program
    {
        /// <summary>
        /// The main entry point for the application.
        /// </summary>
        [STAThread]
        static void Main()
        {
            Application.EnableVisualStyles();
            Application.SetCompatibleTextRenderingDefault(false);
            Application.Run(new CalculatorUI());

            // Define Appium Options
            var appiumOptions = new AppiumOptions();
            appiumOptions.AddAdditionalCapability("app","Microsoft.WindowsCalculator_8wekyb3d8bbwe!App");
            appiumOptions.AddAdditionalCapability("platformName", "Windows");
            // Create Appium Windows Driver
            WindowsDriver<WindowsElement> driver = new WindowsDriver<WindowsElement>(new Uri("http://127.0.0.1:4723"), appiumOptions);

                // Find and Click Number Buttons
                WindowsElement btn1 = driver.FindElementByAccessibilityId("num1Button");
                WindowsElement btn2 = driver.FindElementByAccessibilityId("num2Button");
                WindowsElement btnPlus = driver.FindElementByAccessibilityId("plusButton");
                WindowsElement btnEquals = driver.FindElementByAccessibilityId("equalButton");
                btn1.Click();
                btnPlus.Click();
                btn2.Click();
                btnEquals.Click();

            if (driver == null)
            {
                Console.WriteLine("App not started.");
                return;
            }
            //Taking test screenshots
            driver.Manage().Window.Maximize();
            var screenShot = driver.GetScreenshot();
            screenShot.SaveAsFile(
            $".\\Screenshot{DateTime.Now.ToString("ddMMyyyyhhmmss")}.png",
            OpenQA.Selenium.ScreenshotImageFormat.Png);

            // Find and Verify Result
            WindowsElement resultText = driver.FindElementByAccessibilityId("CalculatorResults");
                string actualResult = resultText.Text;
                string expectedResult = "Display is 3";

                if (actualResult == expectedResult)
                {
                    Console.WriteLine("Test Passed!");
                }
                else
                {
                    Console.WriteLine("Test Failed!");
                }

              driver.Quit();

            }
        }
}
The results of a successful test look like this (since the calculator button digit for three has been pressed for addition):

As you can see, this passes (because we keyed in buttons 1 + 2 to get a result of 3).
If we click other buttons, the test will fail. The Appium tests did not pass because the calculator buttons were not clicked correctly. The output window will show the message "Test Failed" to indicate this.
Debugging tips for Appium Inspector
Failed script? Don't fret – if your test script encounters issues, Appium Inspector comes to the rescue with debugging.
Log Exploration: Check the “Logs” panel to access Appium logs. These logs offer insights into errors, pinpointing details like error line numbers and stack traces.
Element Insights: To locate the root cause of a problem, use the “Elements” panel to choose and inspect elements within the application.
You can always review and playback the recording to find the point of failure.
Limitations of Appium Inspector
While it’s quite useful for automation testing, Appium Inspector does have some limitations (like any other technology tool).
1. Primary constraint: dependency on Appium
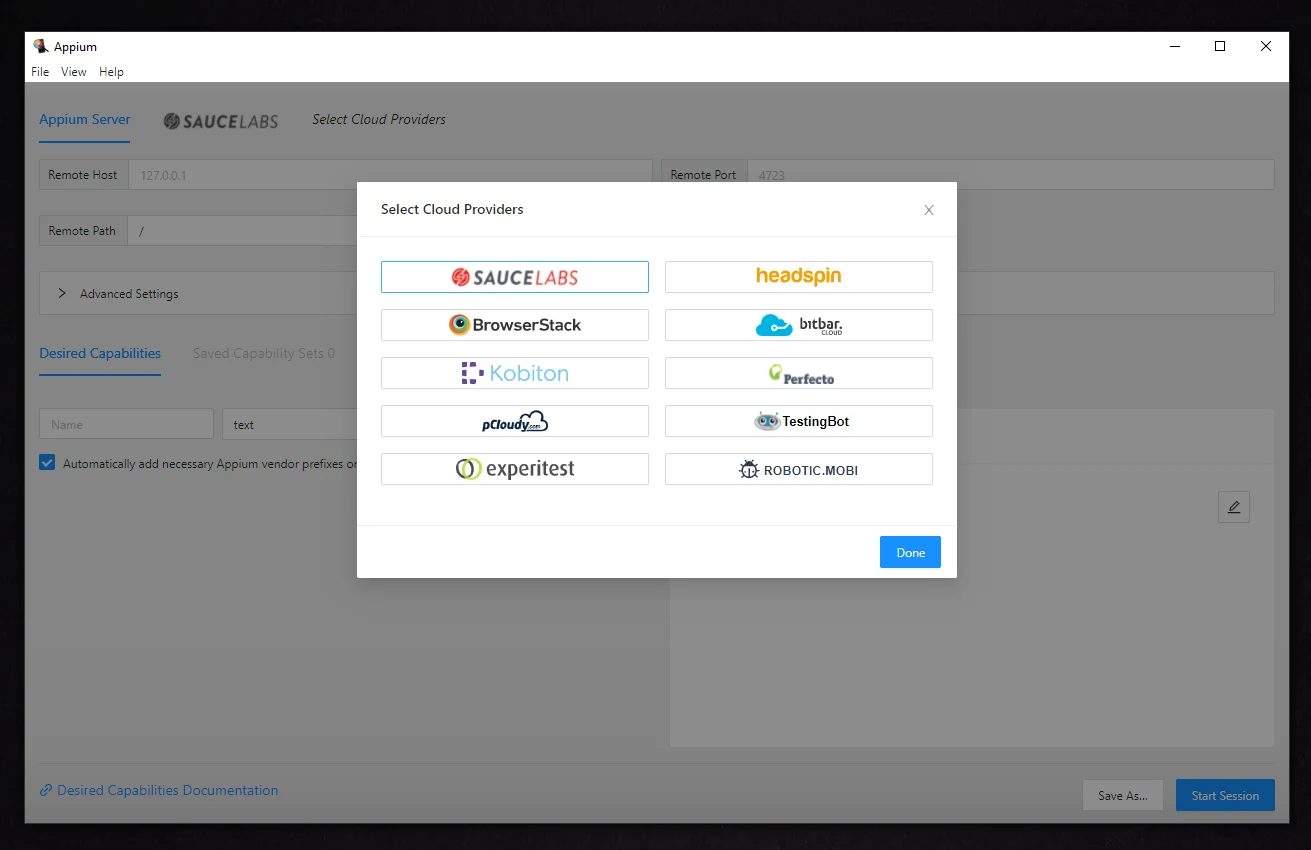
Appium Inspector is limited to inspecting mobile apps that are compatible with Appium. This means that it cannot be used to inspect apps that are not written in native code or that do not use the WebDriver protocol. Remember, if Appium doesn't give its nod to a device, app, or emulator, Inspector won't cooperate either. For broader app coverage, turn to Xcode, Android Studio, or Sauce Labs Inspector.
2. Does not support hybrid app testing
Appium Inspector currently only works for mobile web and native apps. It doesn’t support other types of apps like hybrid, Ionic, or React Native apps. So, if you need to test those types of apps, Inspector won’t work – and you’ll need a different solution.
3. Limited test coverage – local vs. cloud installation
Appium Inspector requires manual installation on each tester's local machine – unlike other tools like Sauce Lab’s Inspector, which leverages cloud-based testing without any local setup. This local setup can slow down the entire testing process and create silos within the testing teams.
4. Limited automation workflows across apps
Given that Appium Inspector only allows you to interact with one app at a time, it limits workflow automation that involves switching between multiple apps. In contrast, tools like Perfecto and TestComplete excel in seamless testing across multiple apps, enabling the validation of interconnected workflows (such as fund transfers between different apps).
Appium Inspector Best Practices
When using Appium Inspector, follow these best practices to get the most out of this useful tool:
Start with a test plan
Before diving into the Inspector, have a solid test plan in place that outlines your testing scope and objectives. Know what features and functionality you want to test on the app. This will make your inspection more focused and efficient.
Document your inspection/take screenshots
Appium Inspector allows you to take screenshots during test recording and playback. You can also record locator values, attributes, observations, or anything else that would be useful when writing tests. Take advantage of this to visually verify the state of your app during testing. Your inspection documentation and screenshots also come in handy when debugging failed tests and building automation test coverage.
Keep your locators dynamic
When creating locators to find elements, use the attributes that are least likely to change, like accessibility ID, XPath, or class name. Avoid using attributes like text content, index, or CSS selectors, which can easily change and break your tests.
Use the Page Object Model
For larger test suites, it's best to organize your tests using the Page Object Model. This keeps your tests DRY (Don't Repeat Yourself) by storing locators and methods for pages in your app in page object classes. Your tests then interact with these page objects.
Simulate user interactions
Interact with as many elements as possible. Tap buttons, enter text, swipe, and scroll. This helps ensure you have the right locators and also gives context about how elements function and relate to each other.
Summing Up Your Appium Inspector Adventure
This guide examined the core of mobile app testing using Appium Inspector. We set it up on Windows, explored recording features, and delved into inspecting app elements.
But hold on, we're just scratching the surface! There's a whole world of testing tools waiting. Get started with Appium on Sauce Labs or dive in and find what suits your team. And here's the kicker – Sauce Labs has your back. From Appium Inspector to a range of mobile testing tools, we've got you covered. With cross-platform and cross-browser testing, your app's performance is in safe hands.