
Unit Testing
Thousands if not millions of developers use JUnit for their Java unit testing. And what are they using it for? Even after 20 years of JUnit’s existence it is still mostly being used for unit tests. If you are lucky you may see an integration test or two.
JUnit is, in fact, much more than a unit testing framework. Did you know that within your regular JUnit test suite, you can even include acceptance tests?
Let’s recall Mike Cohn’s testing pyramid:

Source: Martin Fowler, TestPyramid, based on Mike Cohn’s book Succeeding with Agile
At the bottom are regular unit tests. There are a lot of these because we aim to cover as much of our code as possible.
But unit testing only tests parts of our code in isolation - it can’t see how things play together. For that, we have those two layers above:
Service / integration testing - making sure the components of our application are glued together properly. For example, ensuring that our logging in place and that our controller can deserialize a request into a saved entry in our database.
UI / acceptance testing - making sure a feature in the software actually works from the user’s perspective. For example, your user can click to add an item to their shopping cart and checkout.
The pyramid guides as to have a variety of tests of various amounts based on their level. To understand why let’s look at an example. Imagine you need to test a tax calculator on an eCommerce site. This is a crucial feature because if it fails, people can’t buy and the company loses money.
So you write lots of unit tests to make sure every possible input to the tax calculator produces the right output. With these tests in place, you feel confident that no matter which country, region, currency and purchase amount are entered, the tax amount will be correct.
After some tweaks, all the unit tests pass. Build is green! Ready to go!

But then you get a call from management (for dramatic effect, let’s say it’s 2am) saying the shopping cart interface is broken on the site.
You start a browser and go through the purchase process, and then at the last stage, when users need to view the tax amount, the amount isn’t shown at all. A browser issue caused another DIV to move out of place, and the tax amount is hidden by an ugly rectangle.
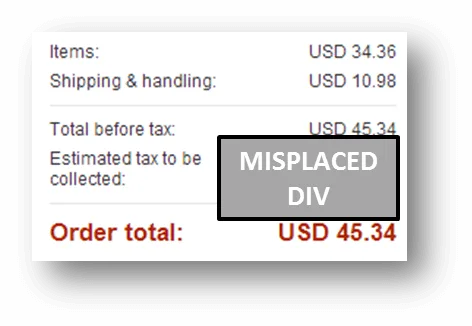
So even with all those unit tests, the user experience is broken. This may sound over the top but incidents like this happen frequently. Ensuring your fine-grained business logic is important- but just on it’s own, it can’t make sure that critical software functions work end to end. That’s why integration and acceptance tests are needed.
Most of us know this in the back of our minds. Only a few of us actually venture out to write and execute these tests. But in fact, it’s much easier than you think.
Unit tests and Selenium tests - happy neighbors?
Here’s a JUnit test folder of a small Jenkins plugin we have written especially for this post. On first glance, it looks like just any other test folder.
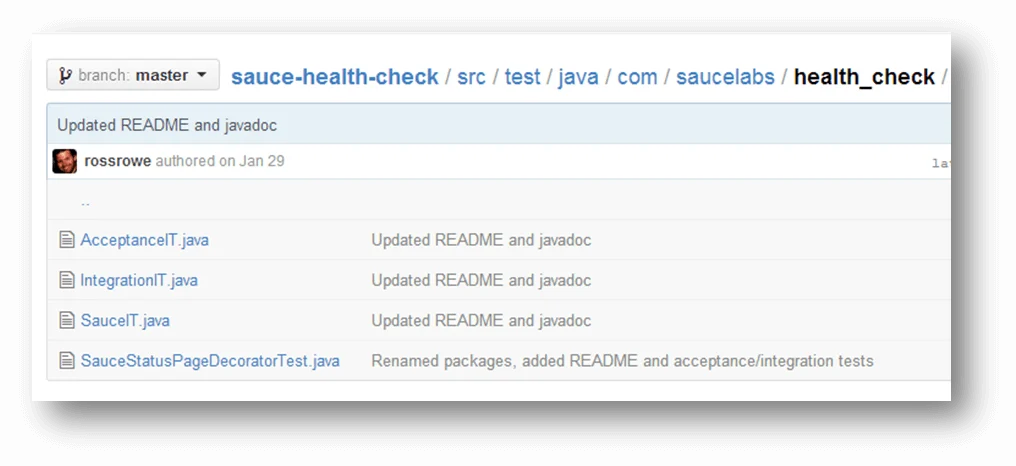
But take a closer look:
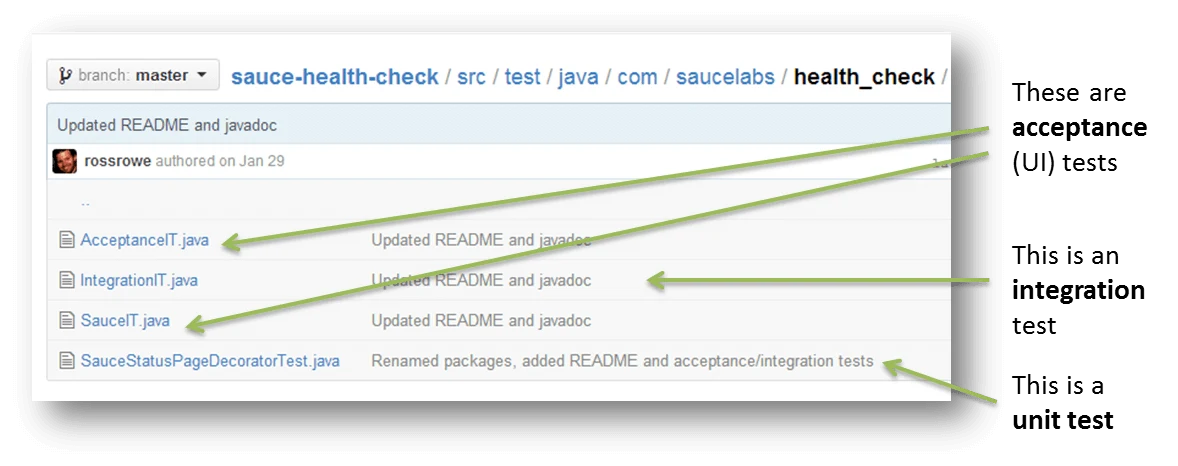
In this JUnit folder, living peacefully side-by-side, are tests from all three tiers of the testing pyramid. The fourth test listed is a regular unit test, but the top three tests in the list are actually based on Selenium 3.
The unit test file has regular stuff like this:
1quickstart...2@Test3public void successResponse() {4SauceStatusHelper statusHelper = new SauceStatusHelper() {5@Override6public String retrieveResults(URL restEndpoint) {7return "{\"service_operational\" : true, \"status_message\" : \"Basic service status checks passed.\"}";8}9};10SauceStatusPageDecorator pageDecorator = new SauceStatusPageDecorator(statusHelper);11assertEquals("Sauce status mismatch", "Basic service status checks passed.", pageDecorator.getsauceStatus());12}13...
And the acceptance tests for this Jenkins plugin have Selenium code that drives a real browser and simulates user actions.
For example, here’s a bit of code that uses a real browser (e.g. Chrome) to click the link “Manage Jenkins”, then click “Manage Plugins”, then verify that the plugin is installed:
1public void pluginIsListed() {2//Find and click on the 'Manage Jenkins' link3webDriver.findElement(By.linkText("Manage Jenkins")).click();4//It takes a few seconds for the page to load, so instead of running Thread.sleep(), we use the WebDriverWait construct5WebDriverWait wait = new WebDriverWait(webDriver, 30);6wait.until(driver -> driver.findElement(By.cssSelector("h1")).isDisplayed());7//assert that we are on the Manage Jenkins page8assertEquals("Header not found", "Manage Jenkins", webDriver.findElement(By.cssSelector("h1")).getText());9//Find and click on the 'Manage Plugins' link10webDriver.findElement(By.linkText("Manage Plugins")).click();11wait.until(driver -> driver.findElement(By.linkText("Installed")).isDisplayed());12//Find and click on the 'Installed' link13webDriver.findElement(By.linkText("Installed")).click();14assertEquals("Plugin link not found", "Sauce Health Check plugin", webDriver.findElement(By.linkText("Sauce Health Check plugin")).getText());15}
Does that not seem powerful? Let’s dive in a bit deeper and see how simple it is to cover all three tiers of the testing pyramid in one JUnit test suite.
Code example with all three testing tiers: Sauce Labs Health Check
We want to show you how easy it can be to integration and acceptance test with JUnit. To do this, we created a simple plugin we have written is called Sauce Health Check - see it on Github. The goal is to connect to our Sauce Labs multi-browser testing service se ensure it is up and running. Here’s what it does in detail:
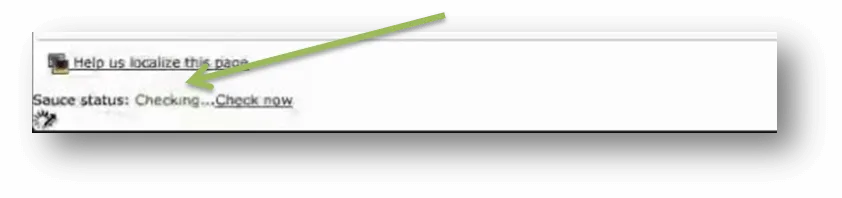
Adds a line to the bottom of the Jenkins interface, like this:
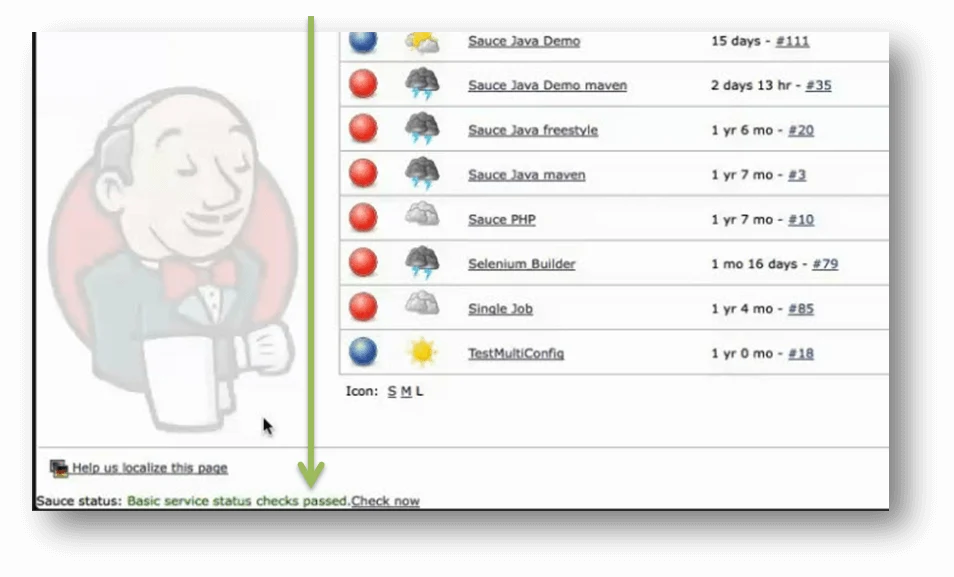
Performs a REST call to the Sauce Labs cloud service to see its status - up or down.
Depending on the status, the message will be green and will say “Basic service status checks passed”, like in the screenshot; otherwise red and will say “Sauce Labs down.”
The “Check now” link is an AJAX call. When clicked, it shows a little “working” icon and re-checks the status of the service. We purposely made this an AJAX call because that’s something that can only be fully tested with browser/UI automation.
In case you’re wondering - why would you need to see the Sauce Labs status at the bottom of your Jenkins dashboard? No reason. It’s just the simplest piece of software we could think of that could help us demonstrate all three tiers of Java testing.
The code is simple and we won’t run you through it - suffice it to say that there’s a descriptor that tells Jenkins this is a plugin, a SauceStatusHelper which calls the Sauce Labs REST API to see if the service is up or down, and a PageDecorator which defines how the result is displayed on the Jenkins interface.
It’s showtime! See the tests
As promised, here are all three tiers of testing within one JUnit test suite, testing the Sauce Health Check Plugin.
1. Unit Tests
The unit tests reside in SauceStatusPageDecoratorTest.java. Here we have 3 functions that test what messages the PageDecorator may return, depending on the Sauce Cloud’s status.
The REST API is stubbed out to create a self-contained test of the code. If these unit tests pass, it means that the basic logic of the plugin is coded correctly.
Testing when Sauce is down:
1@Test2public void errorResponse() {3SauceStatusHelper statusHelper = new SauceStatusHelper() {4@Override5public String retrieveResults(URL restEndpoint) {6return "{\"service_operational\" : false, \"status_message\" : \"Sauce Labs down\"}";7}8};9SauceStatusPageDecorator pageDecorator = new SauceStatusPageDecorator(statusHelper);10assertEquals("Sauce status mismatch", "Sauce Labs down", pageDecorator.getsauceStatus());11}
We test this because the service is rarely down, so it is hard for us to test this via UI automation. But we ensure to diligently test against our edge cases, not only our happy paths. Now, testing when Sauce is up:
1@Test2publicvoid successResponse() {3SauceStatusHelper statusHelper =new SauceStatusHelper() {4@Override5public StringretrieveResults(URL restEndpoint) {6return "{\"service_operational\" : true, \"status_message\" : \"Basic service status checks passed.\"}";7}8};9SauceStatusPageDecorator pageDecorator = new SauceStatusPageDecorator(statusHelper);10assertEquals("Sauce status mismatch", "Basic service status checks passed.", pageDecorator.getsauceStatus());11}
And when an empty string is returned by the REST call (status unknown):
1@Test2public void invalidResponse() {3SauceStatusHelper statusHelper = new SauceStatusHelper() {4@Override5public StringretrieveResults(URL restEndpoint) {6return "";7}8};9SauceStatusPageDecorator pageDecorator = new SauceStatusPageDecorator(statusHelper);10assertEquals("Sauce status mismatch", "Unknown", pageDecorator.getsauceStatus());11}12}
2. Integration Test
Now we want to check that our code integrates with Jenkins correctly by ensuring that the plugin is properly installed on Jenkins. We do this using a bit of Selenium 3 (A.K.A Selenium Webdriver) code. The integration tests are in IntegrationIT.java.
First off we define the WebDriver instance variable (WebDriver is the piece of Selenium that automates the browser), and define a JUnit rule that launches a local Jenkins instance with our plugin installed.
private WebDriver webDriver; @Rule public JenkinsRule jenkinsRule = new JenkinsRule(); } }
Now we start an actual Chrome browser, by creating a new ChromeDriver instance and point it to the URL of the local Jenkins instance.
1@Before2public void setUp() throws Exception3{this.webDriver = Drivers.localResourceChromeDriver();4URL url = jenkinsRule.getURL();5webDriver.get(url.toString());6}7// Our tests are well-factored, so we use a helper method to new up the source-controlled driver without duplicating the code all over our tests:89public class Drivers {10static ChromeDriver localResourceChromeDriver() {11URL resource = Drivers.class.getClassLoader().getResource("chromedriver.exe");12System.setProperty("webdriver.chrome.driver", resource.getPath());13return new ChromeDriver();14}15}16
That’s all it takes to fire up a real browser from within the code. Now we start the actual test - on the Jenkins dashboard, find and click the Manage Jenkins link:
@Test
public void pluginIsListed() {
//Find and click on the 'Manage Jenkins' link
webDriver.findElement(By.linkText("Manage Jenkins")).click();
Wait a few seconds for the page to load (remember we are on a real Chrome browser), using the
WebDriverWait
construct, but wait only until the H1 title of the page has rendered:
webDriverWait wait = new WebDriverWait (webDriver, 30);
wait.until (driver -> driver.findElement(By.cssSelector("h1")).isDisplayed());
Check the H1 title and ensure we are on the Manage Jenkins page:
assertEquals("Header not found", "Manage Jenkins", webDriver.findElement(By.cssSelector("h1")).getText());
Find and click on the Manage Plugins link:
webDriver.findElement(By.linkText("Manage Plugins")).click();
Find and click on the Installed link, as soon as it has rendered on the page:
webDriverWait wait = new WebDriverWait (webDriver, 30);
wait.until (driver -> driver.findElement(By.cssSelector("h1")).isDisplayed());
