Blog
Visual Regression Testing Basics
Visual regression testing, part of visual testing, ensures that any updates to the system, software, or code do not impact the product's user interface or usability. Continue reading to learn more about visual regression testing, including its advantages, how it works, and how to get started.

In a world where technological advances are made on a daily basis, software products are often affected by routine updates. While updating software is necessary for all businesses, it can introduce a slew of bugs into applications and websites. If these software bugs are not thoroughly tested, validated, and fixed, they could end up costing the company a lot of money in production. User interface (UI) and visual bugs in software products are often disregarded due to the focus on functional testing. Regressions that are brought about by software updates should be prioritized, however, because they affect the usability of applications and websites.
This is where visual regression testing comes in. Visual regression testing, part of visual testing, ensures that any updates to the system, software, or code do not impact the product's user interface or usability. Continue reading to learn more about visual regression testing, including its advantages, how it works, and how to get started.
What Is Visual Regression Testing ?
Visual regression testing, also known as visual validation testing or UI testing, is a software quality assurance technique used to inspect websites and apps for user interface bugs. Every time a code change occurs, it looks for any unexpected visual changes or visual “regression” defects by taking snapshots of the user interface and comparing them from one commit instance to another.
Visual regression testing ensures that new code changes do not affect the layout or content display of the application’s user interface. It focuses on validating visual elements like buttons, menus, colors, brightness, positioning, font, color contrast, and other HTML DOM components. These visual validations are difficult to implement because they require taking screenshots of the current state of the web page and comparing them to the previously captured baseline web page. If they notice a change in the content, they immediately highlight and report the changes. This assists software engineers, QA testers, UX designers, and other teams in resolving visual bugs and ensuring consistent page rendering. Regression testing is inefficient and time-consuming when done manually, which is why automated tests are preferred.
Benefits of Visual Regression Testing
With the increasing demand for quality software products, implementing automated regression testing guarantees a better user experience. By verifying that the layout and visual elements of the DOM align with the initial UI expectations, usability is greatly improved.
A higher success rate for visual regression testing increases the confidence that users and developers have in their products. It guarantees that visual errors are detected early and resolved quickly, thus ensuring continuous business operations. Early defect detection cuts down on time spent fixing issues and redoing things, thus accelerating software development, debugging, and release cycles.
In the Agile methodology paradigm, visual regression testing ensures continuous testing, which helps with the overall quality and stability of the software. Since visual regression tests are performed in various stages of development, they decrease the probability of missing hidden bugs.
How Does Visual Regression Testing Work?
The fundamental method of visual regression testing involves taking screenshots of the user interface (UI) before and after a change is made, then comparing them. Afterwards, the test engineer can review the differences that have been highlighted. Visual regression testing actually works by incorporating checkpoints into different stages of software development.
Visual regression testing can be carried out manually (with human involvement) or automatically (using a testing tool and script). Given the subjective nature of user interfaces, it is ideal to strike a balance between the two.
Visual Testing Methods
The following are some of the methods used in visual regression testing:
Developing dedicated visual tests: This method entails writing assertion and validation tests primarily from scratch in a scripting language.
Including visual tests in functional test integration: Functional tests are frequently given priority during development. This method incorporates visual checks that verify the UI pages using existing functional test code.
Using existing testing frameworks for implicit visual testing: This approach enables you to perform general visual regression testing with the least amount of code possible by using existing testing frameworks.
The general visual regression process involves either a pixel-to-pixel comparison of images, a DOM-based comparison, or an AI-based visual comparison of UI elements.
Visual Regression Tools
Depending on your application's complexity and the level of coverage you require, there are a variety of tools available for visual regression testing. Visual regression tools can be divided into two categories: no-code tools, which you can integrate into your project and use right away, and testing frameworks, which require developers to create coded test scripts. Below, we will discuss a few tools for visual regression in more detail.
Sauce Labs Visual Testing (formerly Screener.io)
To improve the development and testing process, Sauce Labs Visual Testing (formerly Screener.io) can be integrated into your pipeline for continuous integration. Sauce Labs Visual automates visual testing by continuously recording and running tests in the cloud. Since no coding is required, you can easily create, run, and automate your own visual tests. Sauce Labs Visual employs screenshots and DOM snapshots to detect visual bugs on app pages and ensure a platform-independent UI.
PhantomCSS
PhantomCSS, an open source project owned by Huddle, is a visual regression testing tool that automates the process using CasperJS, Resemble.js, and PhantomJS. It validates visual elements of web apps, live style guides, and responsive layouts.
Other popular visual regression testing tools include Rainforest QA, Applitools, Kobiton, Percy, and FBSnapshotTestCase. Once the tests are written, you can interact with the browser using tools such as Puppeteer, TestCafe, WebdriverIO, Playwright, Selenium, or Cypress. These tools support visual tests and can generate screenshots of web pages.
How to Implement Visual Regression Testing
Depending on the tools you use, there are various approaches to implementing visual regression testing. In this section, we'll use Sauce Labs Visual and Storybook. These tools can provide us with automated visual regression test results for React, Vue, Angular, and HTML components.
Before getting started, ensure that you have the following:
A Sauce Labs self-serve or enterprise account with access to visual testing. To request access, contact your CSM or Sauce Labs Support. Visual testing is not available for free trial accounts.
Your Sauce Labs username and access key.
Your Visual Testing Screener API key.
After that, you can create a sample React Storybook application project. We’ll show you how below.
Step 1: Create a Storybook React Application
Navigate to your machine's home directory using your terminal, then run the commands below.
Install Storybook and create a project folder called “my-storybook:”
npx create-react-app my-storybook
Navigate to the Storybook project:
cd my-storybook
Add Storybook to the project folder:
npx -p @storybook/cli sb init
Launch the Storybook project and open localhost:
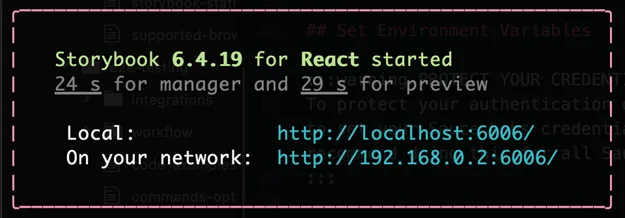
npm run storybook
Once Storybook has been launched, you'll see a response like this in your terminal:
Step 2: Install the Screener Package
Open a new terminal window (different from the one used in the previous step), then navigate to your Storybook project directory:
cd my-storybook
Install the screener-storybook package as a dependency in your project:
npm install screener-storybook --save-dev
Step 3: Link Your Sauce Labs Account
Set your Visual Testing Screener API key as an environment variable in your terminal.
On Mac/Linux, use the following command:
export SCREENER_API_KEY="<your Screener API key>"
Or, for Windows, use:
$Env:SCREENER_API_KEY = "<your Screener API key>"
Step 4: Add the Screener Script
Access your Storybook project's package.json file and add the following npm script to your scripts section:
"test-storybook": "screener-storybook --conf screener.config.js"
Step 5: Create a Screener Config File
Now, make a new JavaScript file called “screener.config.js” in your IDE. Then, paste the following code into it and save it:
module.exports = {
  projectRepo: 'sb-6.1-test',
  storybookConfigDir: '. storybook',
  apiKey: process.env.SCREENER_API_KEY,
  resolution: '1024x768'
};
Step 6: Run a Test
You can run a test using the following command:
npm run test-storybook
Step 7: View the Results
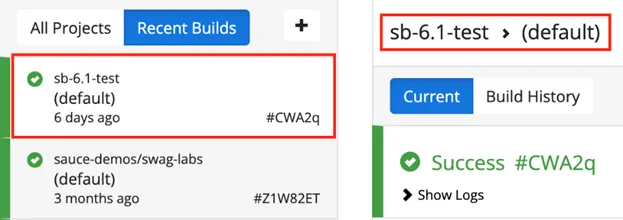
To confirm that your test is running, go to your visual testing dashboard (Sauce Labs Visual Testing > Log in to Visual).
You should see a brand new branch called “default” and a brand new project called “sb-6.1-test.”
It should only take a few minutes to complete the test.
To view your test results on Sauce Labs, go to Show Logs > View Logs.
Step 8: Accept the Baseline
This first test will return as “failed” because there is no existing baseline to use for a comparison. To resolve this issue, go over the new states and accept them as your baseline.
Conclusion
Visual regression testing should be part of your software quality assurance strategy to ensure your product provides a seamless user experience for your customers, every time. In this post, we discussed the fundamentals of visual regression testing, including its benefits and some of the most popular tools. We also explained how to get started with visual regression testing using Sauce Labs' Visual Testing solution, which automates the process and extends the testing coverage.
Any organization that aspires to consistently offer excellent user experiences should adopt and prioritize visual regression testing. However, as application updates increase and regression testing assertions get more complex, it’s difficult for pixel-based image comparisons to provide enough coverage and information to maintain quality and speed. With Sauce Labs, you can speed up the debugging process with end-to-end feedback and pinpoint precisely how code changes affect the UI visually.
About the Author
Faith Kilonzi is a full-stack software engineer, technical writer, and a DevOps enthusiast, with a passion for problem-solving through implementation of high-quality software products.
She holds a bachelor’s degree in Computer Science from Ashesi University. She has experience working in academia, fin-tech, healthcare, research, technology, and consultancy industries in both Kenya, Ghana, and in the USA. Driven by intellectual curiosity, she combines her passion for teaching, technology, and research to create technical digital content.