Jenkins is a flexible, open source CI server, with hundreds of plugins to support building, testing, and deployment. This article will walk you through the necessary steps to set up a new Jenkins CI server.
7 Best Practices for CI/CD Architecture
It’s important to plan your CI architecture carefully: design and establish standards for how the software will move to production. It’s important to understand the tech stacks involved, as well as your overall goals for the system, and then consider the infrastructure. This will enable a stable and restorable CI pipeline.
1. Determine the goals for your CI/CD pipeline
What are the overall goals for your CI pipeline?
Do you want to be able to ship code to production once every two weeks? On every commit?
Is the software a web application, capable of changing second-by-second? Is it a complex mobile application, which must undergo Apple/Google reviews every time it ships?
What languages, libraries, and dependencies will be used by the teams involved? Will the system require additional maintenance or scalability as a result?
Do lives depend on the successful release of your software? Does it fundamentally affect the revenue of your company?
How many projects will need to use the same system? One? 15? 200?
It’s important for stakeholders to agree on requirements before you start planning out infrastructure.
2. Start planning your Jenkins CI/CD infrastructure
Once you know your overall goals, as well as the tech stacks involved, it’s time to start the infrastructure planning. Make sure to involve your developers, operations, and SRE teams, as well as Security. CI/CD systems manage all sorts of sensitive and secret information, so it is vital to get buy-in and support from everyone involved.
Important to understand is the relationship between a Jenkins Server and its agent nodes. The Server is the brains of the operation, coordinating the job queue, scheduling processes, and tracking results. The Nodes do the actual work of executing jobs and sending results back to the Server.
3. Configure your Jenkins CI/CD pipeline
Treat your CI configuration like code, and make sure changes are captured in you Version Control System. Allowing anyone to make changes–ad hoc and unrecorded–introduces risk, and creates a situation that might prevent easy fixes. By treating configuration-as-code, you throw yourself a lifeline when mistakes happen.
Create generic reusable jobs, naming conventions (e.g. jobs and environment variables); keep jobs small—modularization, scalable infrastructure that allows for auto-scaling of agents/nodes.
4. Choose your Jenkins plugins (carefully)
Jenkins has a list of commonly used, well-supported plugins it will offer to install automatically. However, once you have a running instance of Jenkins, you need to consider what other plugins you might need.
Be conservative with plugin usage. Plugins are maintained by different teams and vendors, and the attention paid to the upkeep can be very inconsistent. They change frequently and can become fragile.
If you see a Jenkins plugin you like, ask yourself:
Do you really need it, will you actually use it, and how important is it to your pipeline?
Do you know who made it?
Can you find out how big the community is?
Is it easy to see what their motivations are for creating the plugin? Is it to help smooth the usage of a tool or online vendor? Is it solely focused on trying to get you to pay for services you might not need?
Here are a few recommended Jenkins plugins:
Git - allows you to integrate GitHub to clone repository (this is one of the suggested plugins available at install)
GitHub Pull Request Builder - builds pull requests in GitHub and reports results
Swarm - enables nodes to auto-discover nearby Jenkins Server and join it automatically
Sauce OnDemand - allows you to integrate Sauce Labs with Jenkins
Slack Notification - allows posting of build notifications to a Slack channel
ThinBackup - backs up the global and job-specific configurations having an upgrade process is important, both for Jenkins versions and for plugins–don't test upgrades on the live production CI server. We recommend setting up a separate Jenkins test environment to check all new plugins before applying a change to your production server.
5. Utilize a configuration management tool
I highly suggest using a configuration management tool to automate the process to achieve speed, scale, repeatability and consistency. I recommend using Scalr, Chef, Ansible, CircleCI, and Terraform.
6. Use a repository for CI artifacts
Consider creating GitHub webhooks for version control repositories. I recommend using Artifactory (cloud storage) for CI artifacts.
7. Set up a backup Jenkins CI server (fail safe)
Set up a backup process for Jenkins configuration. Script a Jenkins job to use the thinBackup plugin or S3 plugin to send the Jenkins configuration to an Amazon S3 (cloud storage).
How to Set Up and Configure a Jenkins Master Server
Once Jenkins has been installed, you’ll need to customize and tweak it to match your teams’ needs.
Install and manage Jenkins plugins
Now is the time to install the Jenkins plugins you selected earlier. Here’s how:
Steps
Navigate to Jenkins Web Interface > Login as Admin > Manage Jenkins > Manage Plugins > Available (Tab)
Select the checkbox for all the plugins you want to install.
Select Download now and install after restart at the bottom of the page.
After Jenkins finishes restarting, the installed plugins will appear under Manage Plugins > Installed (Tab).
Configure system settings
The Configure System page contains different configuration categories, and serves as the main area for major changes to how the system operates.
Steps
Navigate to Manage Jenkins > Configure System
Set the number of executors to 0. You don’t want the Jenkins server to execute jobs itself. The admin server should only orchestrate jobs, and shouldn’t do the work of a node
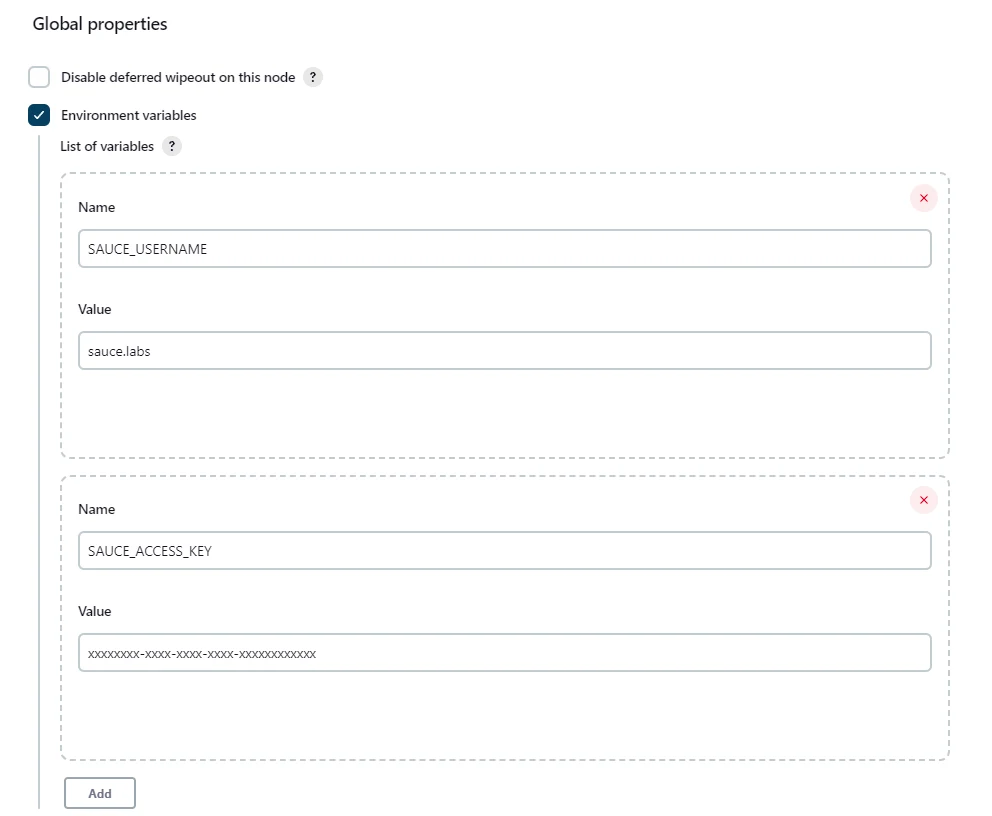
Under Global Properties, select the checkbox for Environment Variables.
Set the environment variables (e.g., SLACK_TOKEN, SAUCE_ACCESS_KEY).
Configure global settings
By default, all Jenkins users are admins. We recommend enabling LDAP or SSO, which allows you to use a shared corporate service to validate users. Users can log into Jenkins with their usual company login credentials. Your IT team can help you set this up.
Steps
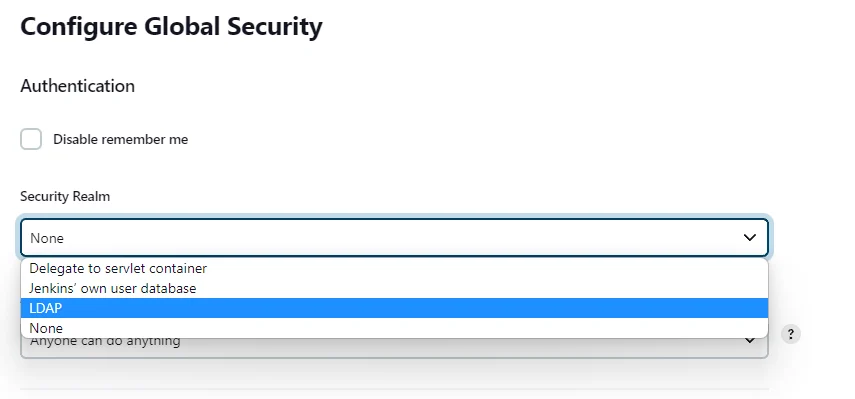
Navigate to Manage Jenkins > Configure Global Security
Under Security Realm, select LDAP from the drop-down menu:
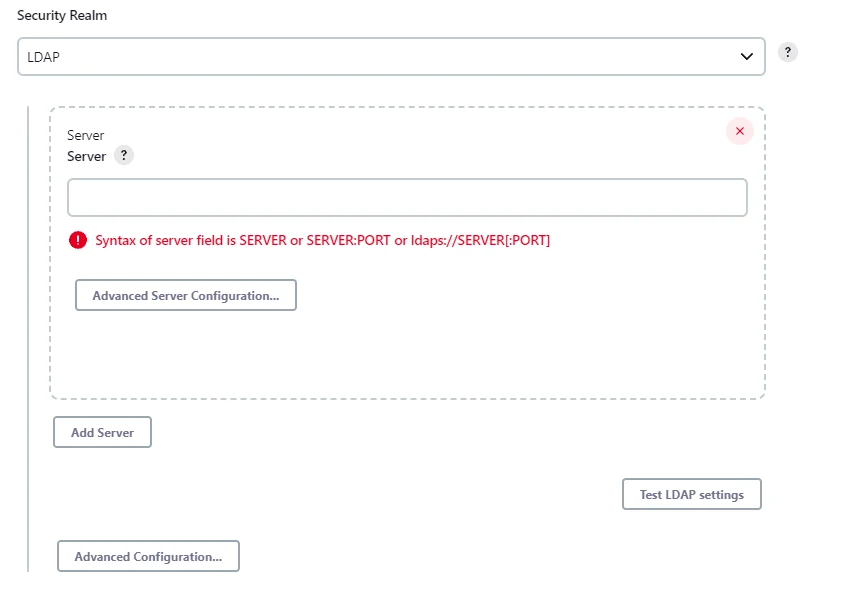
3. Enter the details for the LDAP Server (talk to your IT team if necessary):
4. Select matrix-based security from the Access Control (Authorization) section.
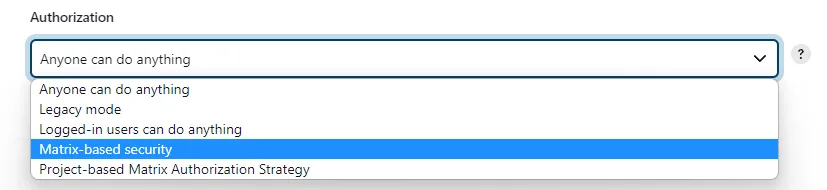
5. As you can see, matrix-based security gives you ultra fine-grain control over what your users have access to, giving you multiple ways to secure your system.

Add and Configure Node (Agent)
There are multiple ways to add and configure a Node, or a group of nodes (usually called a Node farm). The farm will handle the actual work of downloading the source code, compiling it, packaging it, running the tests, and deploying it to a test environment (or, if you’re really on top of things, directly to production!).
For this example, we will be setting up a very simple Node on the same machine as the Server, though we recommend setting up new Nodes on separate machines (or ideally, in the cloud).
Steps
Check that the new Node is ONLINE.
Navigate to Jenkins Web Interface > Login as Admin > Manage Jenkins > Manage Nodes and Clouds
Click New Node
Fill in the Node name, select Permanent Agent, then click Create.
Fill in all the fields, making sure to fill in the Remote Directory (a required field). Check the box for Use WebSocket. The WebSocket option creates a sort of mesh network for efficient communication between the Server and the Nodes, and may not work in all configurations.
Click Save
The Node will not be up and running quite yet–you’ll see the new node with a red X in the Status column. This is expected.
If you click on the Node, it will take you to a screen showing a curl command you can execute on the command-line. This will start the Node, and attach it to the Jenkins Server.
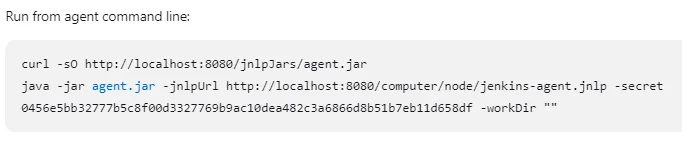
9. Execute this command, then go back to the Manage Nodes and Clouds screen of Jenkins, and you should see that the red X is no longer there:
Once you’re familiar with the process, have a look at the Swarm plugin for managing Nodes in a more scalable way.
The build results and reports are stored on the Jenkins Server, and artifacts should always end up in artifact storage (i.e. JFrog Artifactory ), and not on the Jenkins Server.
Go Time! Ready to Create a CI Pipeline
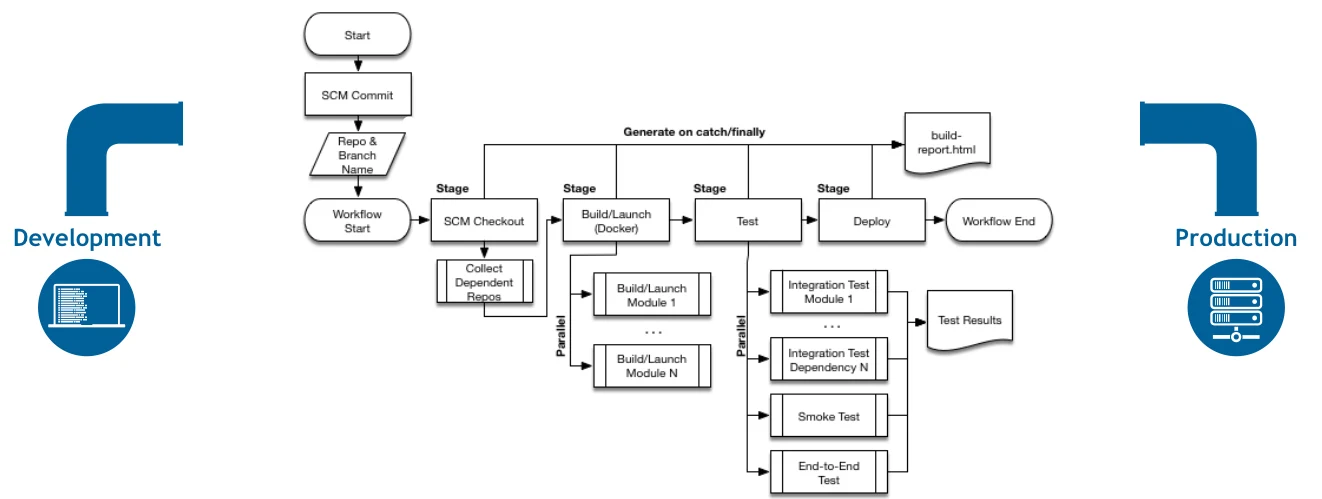
Now that Jenkins is configured, you’re ready to orchestrate or maintain a CI pipeline. I recommend checking out the Jenkins documentation Getting Started with Pipeline to create and deploy your first CI pipeline.
Wrapping Up
This article is intended to help you identify the basic settings and recommended best practices for setting up a simple Jenkins Server with a single Node, and then catch a glimpse of the overall architecture you should be shooting for in order to create a solid build system your team can depend on with high confidence. Check out the Sauce Labs documentation to configure saucectl with Jenkins.

Jump to content
7 Best Practices for CI/CD Architecture
How to Set Up and Configure a Jenkins Master Server
Create a CI Pipeline
